How to Conduct a Prescribed Burn to Improve Your Rural Property
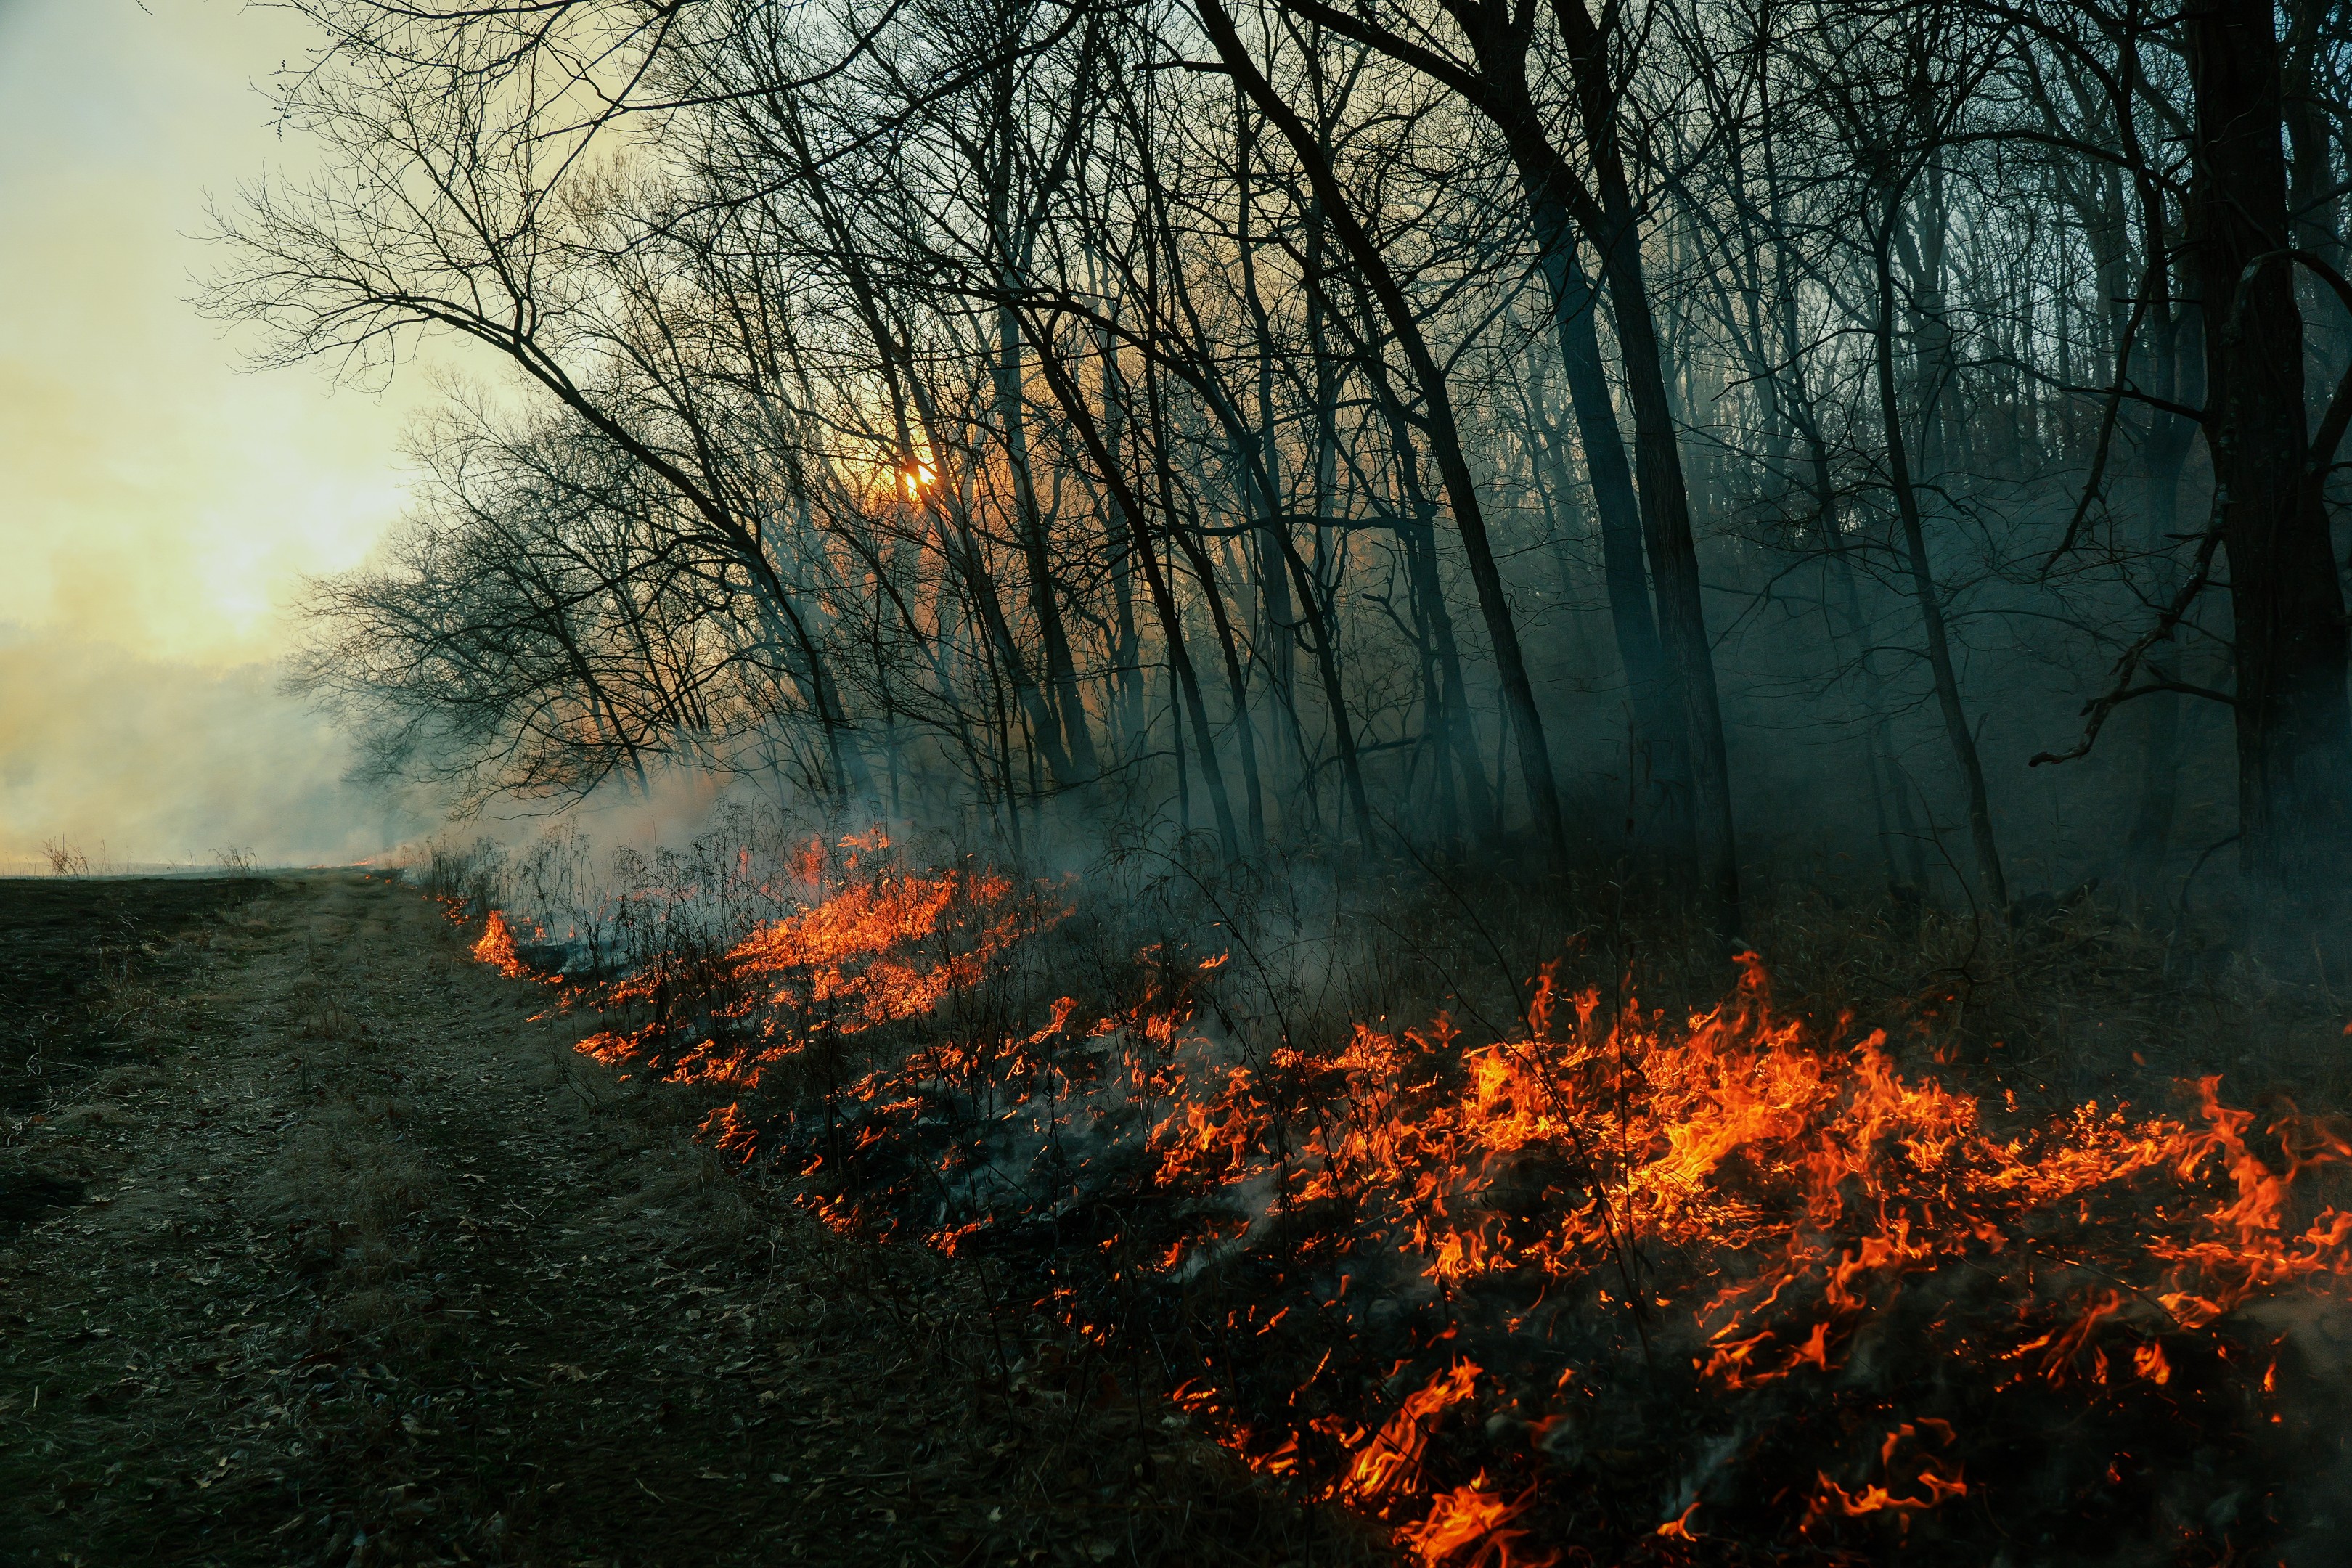
Fire built the Midwest. For thousands of years, periodic wildfire and intentional burns set by Native Americans shaped the prairies, savannas, and open woodlands that defined this landscape. The tallgrass prairies of Missouri, the oak savannas of Illinois, the grasslands of Iowa and Kansas — all of them evolved with fire and depend on it to stay healthy.
Today, less than one percent of the Midwest's original native prairie remains. Without fire, woody invasives creep in, dead thatch smothers new growth, and the diverse plant communities that support whitetail deer, wild turkey, bobwhite quail, and countless other species slowly disappear. Conservationists call this process the "green glacier" — and it's one of the biggest threats to rural land quality in our region.
The good news is that prescribed fire — the planned, controlled application of fire to the landscape — is one of the most powerful and cost-effective land management tools available to rural landowners. A well-executed burn can accomplish in a single afternoon what years of mowing, spraying, and mechanical clearing struggle to match.
At Trophy Properties and Auction, we work with landowners across Missouri, Illinois, Iowa, and Kansas who are serious about making their property the best it can be. This guide draws on the kind of deep, practical knowledge you'd get from a conservation officer with decades of field experience. Whether you've never struck a drip torch or you've been burning for years, there's something here for you.
Why Prescribed Fire Is the Most Effective Land Management Tool You Can Use
Before we get into the how, let's talk about the why. Understanding what fire does to the landscape — at the soil level, the plant community level, and the wildlife level — helps you make better decisions about when, where, and how to burn.
Stimulating Native Plant Growth
Fire removes accumulated dead plant material (thatch and litter) that insulates the soil surface and blocks sunlight from reaching the ground. Once that layer is gone, the soil warms faster in spring, and native warm-season grasses like big bluestem, Indiangrass, little bluestem, and switchgrass respond with vigorous new growth. These fire-adapted species store their energy in deep root systems below ground, so they bounce back quickly and aggressively after a burn.
At the same time, fire stimulates the germination of native wildflowers (forbs) and legumes that are critical components of a healthy prairie ecosystem. Many of these plants have seeds that require heat scarification or the removal of a litter layer to germinate. Without fire, they sit dormant, and the plant community becomes a monotonous stand of rank grass with little diversity.
Suppressing Invasive and Woody Species
Cool-season invasive grasses like tall fescue, smooth brome, and sericea lespedeza dominate millions of acres across the Midwest. These species choke out native plants, provide poor wildlife habitat, and reduce the ecological and economic value of your land. Fire is the most efficient tool for knocking them back.
Prescribed fire also controls woody encroachment — the gradual invasion of eastern red cedar, hedge (Osage orange), honey locust, and other woody species into grasslands and open timber. Left unchecked, these trees shade out native grasses, eliminate ground-level habitat structure, and fundamentally change the character of your property. A single well-timed burn can top-kill young cedars and hardwood sprouts that would take years to remove mechanically.
Improving Wildlife Habitat
This is where prescribed fire delivers some of its most dramatic results for rural landowners.
Whitetail Deer: Young hardwood resprouts that emerge after a burn contain significantly more available protein and phosphorus than unburned browse. Deer actively seek out recently burned areas for the lush, nutritious forage they produce. Fire also creates the mosaic of cover types — open areas next to dense cover — that deer use for bedding, feeding, and travel. If you manage your property for quality deer, prescribed fire should be a cornerstone of your habitat plan.
Wild Turkey: Turkeys benefit enormously from the open understory and diverse plant community that fire creates. Poults (young turkeys) depend on insects for protein during their first several weeks of life, and burned areas produce dramatically more insects than unburned ground. The low, open ground cover with scattered shrubs that results from regular burning is textbook turkey brood habitat. Hens also prefer open ground with good visibility for nesting and poult-rearing.
Bobwhite Quail: Quail are perhaps the species that benefits most from prescribed fire. Bobwhites require native warm-season bunch grasses for nesting — they nest on the ground and need to be able to walk beneath the grass canopy to enter and exit the nest. But quail also need bare ground, forbs, and legumes for feeding and brood cover. The ideal quail habitat is roughly 60% or more wildflowers and legumes with native grass clumps throughout. Fire is the only practical way to maintain this composition at scale.
Pollinators and Songbirds: The flush of wildflowers and native plants that follows a burn supports pollinator populations — bees, butterflies, and other beneficial insects — that are declining across the Midwest. Grassland songbirds like dickcissels, meadowlarks, and grasshopper sparrows depend on fire-maintained habitats for nesting and foraging.
Improving Soil Health
Fire returns nutrients locked in dead plant material back to the soil through ash deposition. It generally lowers soil acidity, which makes nitrogen-fixing legumes more abundant and productive. The rapid warming of soil after a burn accelerates decomposition and nutrient cycling. Over time, properties with a regular prescribed fire program develop healthier, more biologically active soils than those managed without fire.
Reducing Tick and Pest Populations
Prescribed fire can significantly reduce tick populations by removing the leaf litter and ground cover that ticks need to survive. In a region where tick-borne diseases like ehrlichiosis and Rocky Mountain spotted fever are serious concerns, this is a meaningful quality-of-life benefit for anyone who spends time on rural land.
Step 1: Get Trained and Certified Before You Strike a Match
Prescribed fire is powerful, but it's not something to attempt without proper training. Every state in the Midwest has resources to help landowners learn to burn safely and effectively.
Missouri: MDC Certified Burner Program
In Missouri, the Department of Conservation (MDC) offers a Certified Burner program that every landowner should complete before conducting a prescribed burn. The certification involves two parts:
- Online course: The "Prescribed Burning for Missouri Land Managers" course is available online for $25 through the MDC's approved provider. It covers fire behavior, weather interpretation, burn plan development, safety procedures, and legal requirements. You'll be tested throughout the course.
- In-person field day: After completing the online portion, the MDC will contact you to schedule a hands-on field day where you'll work with certified MDC staff on an actual burn. You receive your permanent Certified Burner Certification after successfully completing this field day.
This certification is a prerequisite for having a burn plan developed for you by the MDC or NRCS. It's also your best protection from a liability standpoint, as Missouri's Prescribed Burning Act (RSMo Section 537.354) provides liability protection for certified burners who follow an approved burn plan.
Illinois, Iowa, and Kansas
Each state has similar training opportunities through their respective natural resource agencies, Cooperative Extension services, and prescribed burn associations. Illinois offers training through the Illinois Prescribed Fire Council and University of Illinois Extension. Iowa's training is coordinated through Iowa State University Extension and the Iowa Prescribed Fire Council. Kansas offers certification through K-State Research and Extension and the Kansas Prescribed Fire Council.
Regardless of which state your property is in, the fundamentals are the same: get trained, get certified, and build your confidence under the supervision of experienced burn practitioners before going it alone.
Join a Prescribed Burn Association
One of the best things you can do as a new burner is join a Prescribed Burn Association (PBA). A PBA is a group of landowners and conservation-minded citizens who pool their knowledge, labor, and equipment to help each other conduct burns. Members learn from each other, share equipment costs, and provide the crew numbers that safe burning requires. Many PBAs work closely with MDC Private Land Conservationists, NRCS staff, or Quail Forever wildlife biologists who provide technical assistance and hands-on leadership at burns.
PBAs exist across Missouri, Illinois, Iowa, and Kansas, and joining one is often the fastest way to gain practical experience.
Step 2: Develop a Written Burn Plan
Never burn without a written plan. Period. A burn plan is your prescription, your safety protocol, and your legal documentation all in one. It forces you to think through every aspect of the burn before you light the first match, and it provides the framework your crew needs to operate safely and effectively.
Your burn plan should include the following components:
Burn Objectives
What are you trying to accomplish? Be specific. Examples include: reduce cedar encroachment in a 40-acre native grass pasture, set back cool-season grasses and promote native warm-season grass establishment in a CRP field, improve turkey brood habitat in an oak savanna by opening the understory, reduce fuel loading to lower wildfire risk, or stimulate native forb and legume production to improve deer browse and quail nesting habitat. Your objectives determine everything else in the plan — the timing, the intensity, the firing pattern, and the equipment you'll need.
Site Description and Map
Include a detailed map showing the burn unit boundaries, firebreak locations, interior fuel breaks (roads, creeks, plowed lines), structures, utilities, neighboring properties, smoke-sensitive areas (highways, towns, hospitals, schools), water sources, and staging areas for equipment and personnel. Aerial imagery from Google Earth or your county GIS site makes an excellent base map.
Weather Prescription
This is the most critical section of your burn plan. You'll define the acceptable range for each weather parameter:
- Temperature: Typically between 40°F and 70°F for most Midwest burns. Temperatures above 75°F increase fire intensity and crew fatigue.
- Relative humidity: Generally between 25% and 60%. Below 25%, fuels are dangerously dry and fire behavior becomes erratic. Above 60%, you may struggle to get the fire to carry through the fuel.
- Wind speed: Sustained winds of 5 to 15 mph are ideal for most burns. Below 5 mph, smoke lies down and won't clear the burn area. Above 15 mph, fire behavior can become difficult to control. Avoid burning when gusts exceed 20 mph.
- Wind direction: Steady and consistent is what you want. The wind direction determines where your smoke goes, so plan your burn for a wind direction that carries smoke away from roads, neighbors, and populated areas.
- Mixing height and transport wind: These atmospheric factors determine how well smoke disperses vertically and horizontally. Higher mixing heights and moderate transport winds mean better smoke dispersion. Your local National Weather Service office issues spot weather forecasts for prescribed burns — use them.
- Fuel moisture: The moisture content of fine fuels (dead grass, leaf litter) largely determines fire behavior. Fine fuel moisture of 8–25% is typical for most burns, depending on your objectives.
Firebreak Plan
Firebreaks are the containment boundaries that keep your fire where it belongs. Your plan should describe every firebreak — its type, location, width, and condition. There are several types:
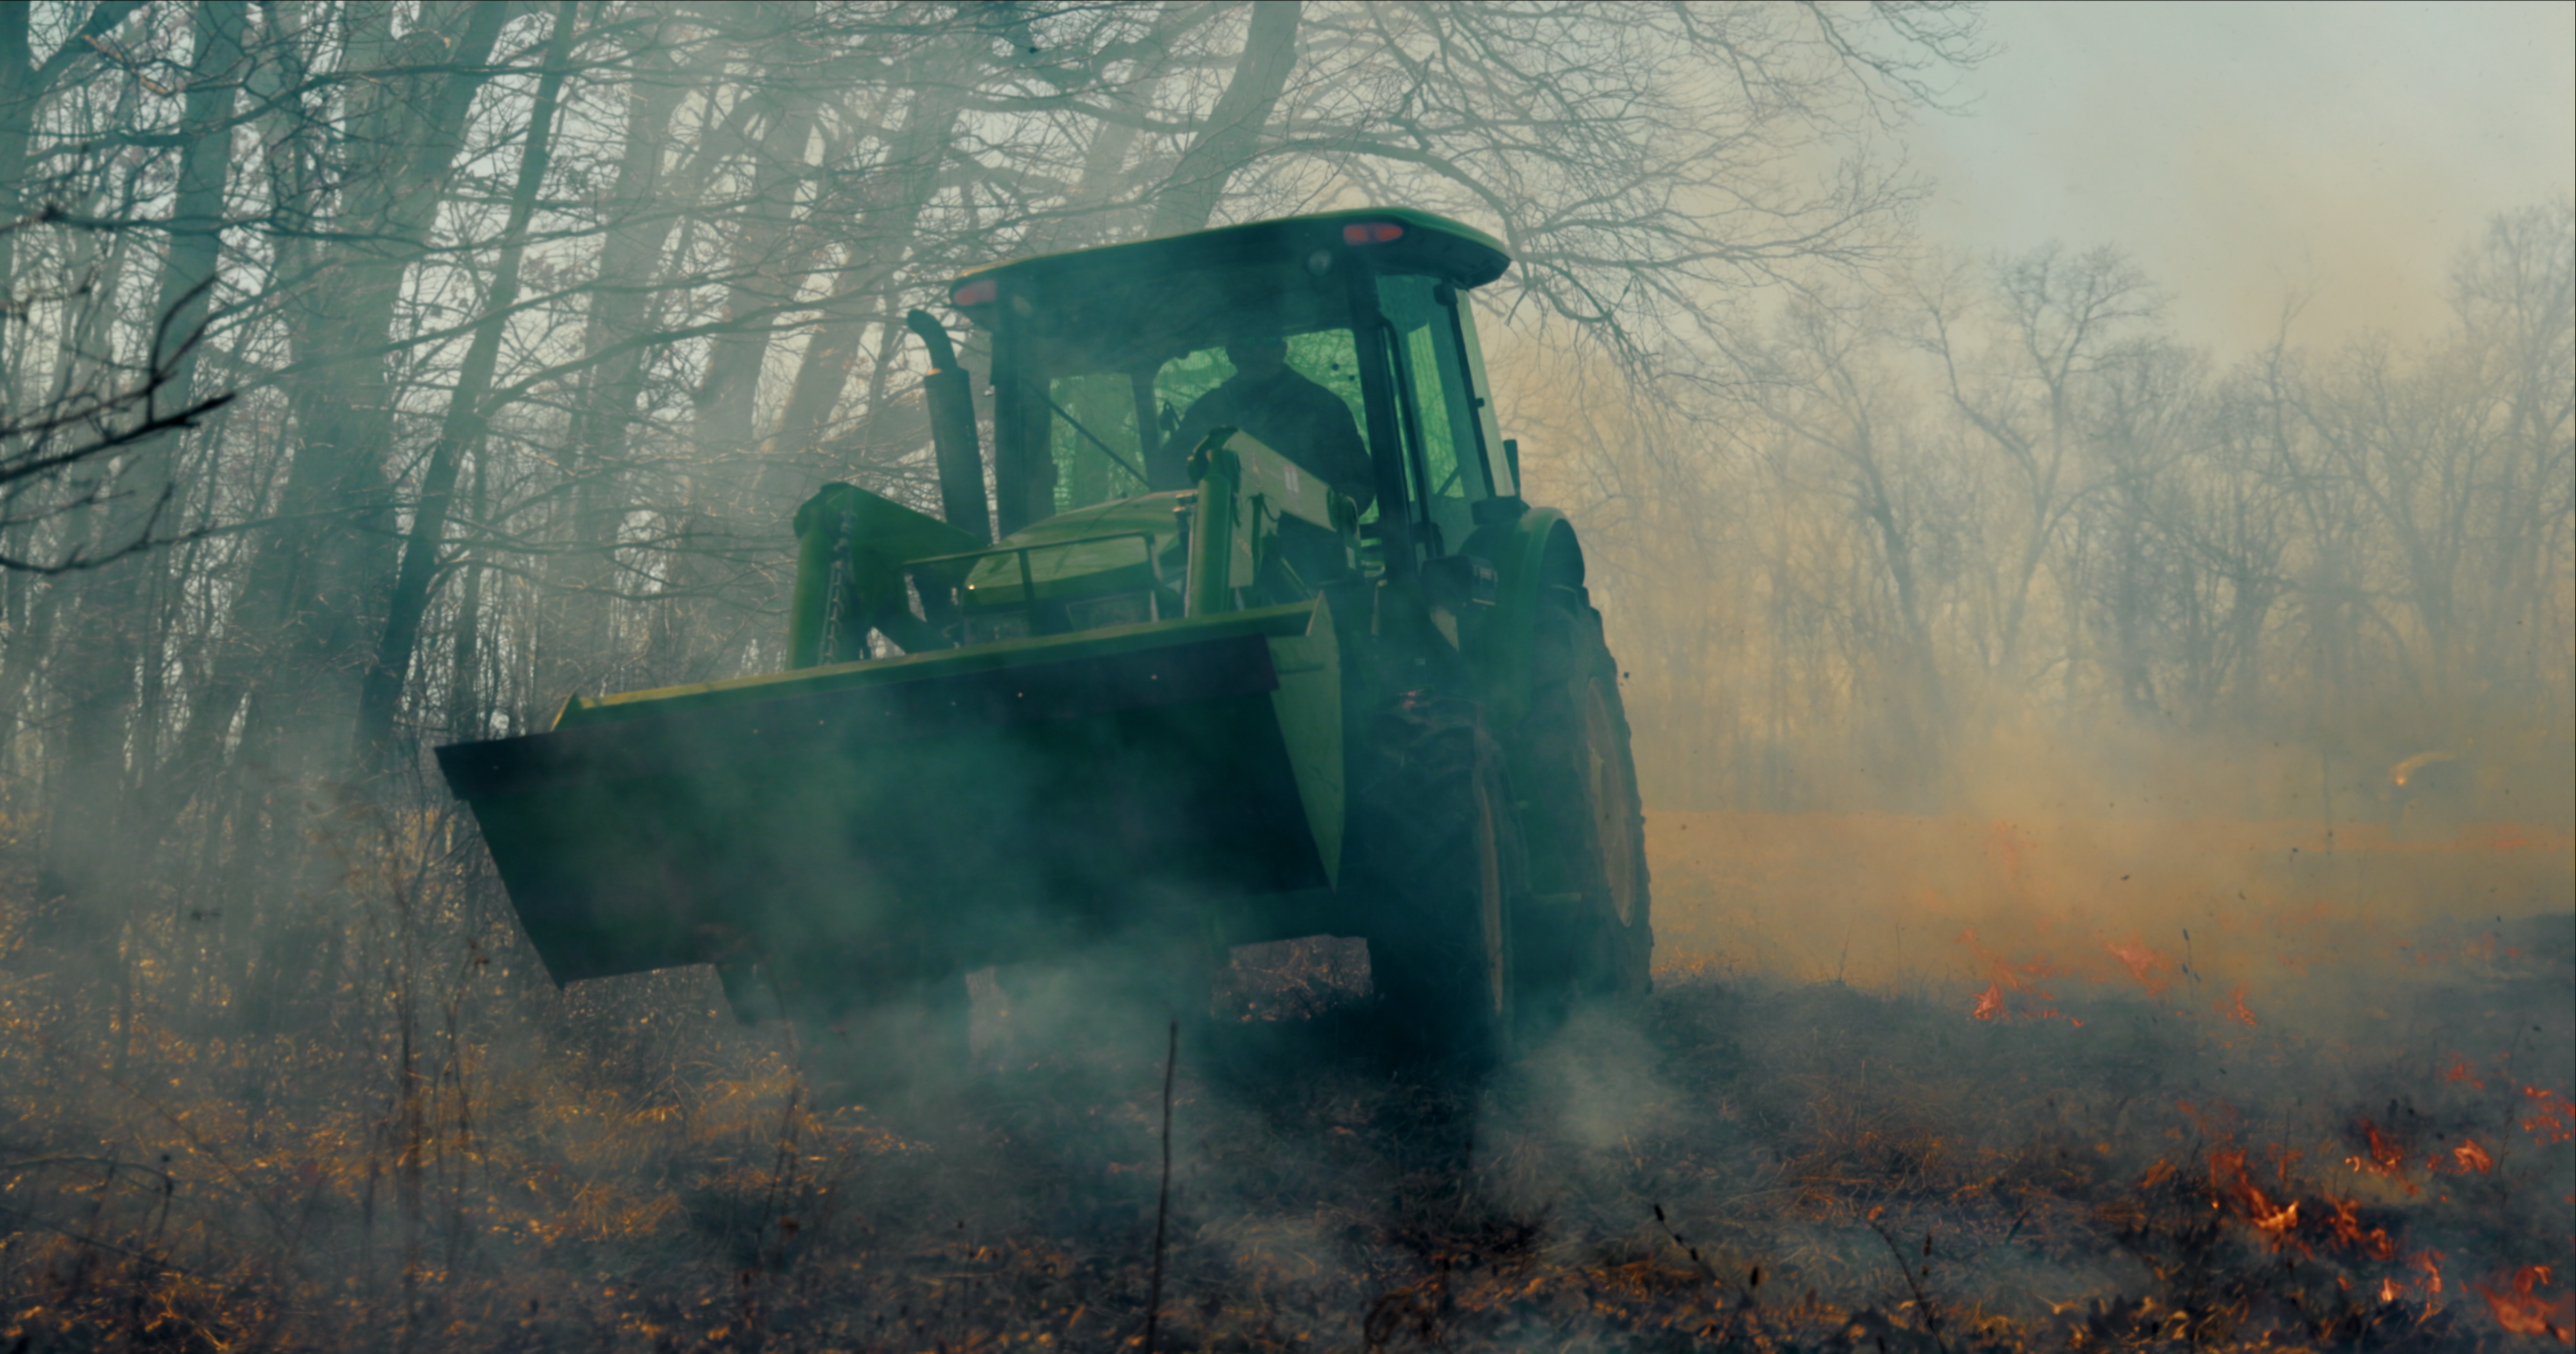
- Bare-soil breaks: The most reliable. Created with a disk, plow, or roto-tiller. A minimum of 2–3 times the expected flame height in width. For tall native grass, plan on 10–30 feet wide. Prepare these 1–3 days before the burn — too early and vegetation regrows or leaves accumulate on them.
- Roads: Gravel and dirt roads make excellent firebreaks with minimal preparation. Paved roads work too, though falling embers can cross pavement in high winds. Mow the road shoulders for extra width.
- Mowed or pre-burned lines: Mowed strips can supplement other breaks, but mowed grass alone may not stop a hot headfire. Pre-burning a strip (a "black line") 2–7 days before the main burn is one of the most effective strategies for widening your containment zone.
- Wet lines: Spraying water along the burn perimeter to create a temporary break. Useful as a supplement but not reliable as your primary containment, since wet lines dry out quickly on warm, windy days.
A good rule of thumb: your firebreak should be at least three times as wide as your expected flame height on the downwind and crosswind sides. For headfire runs through mature native grass, that can mean 30 feet or more.
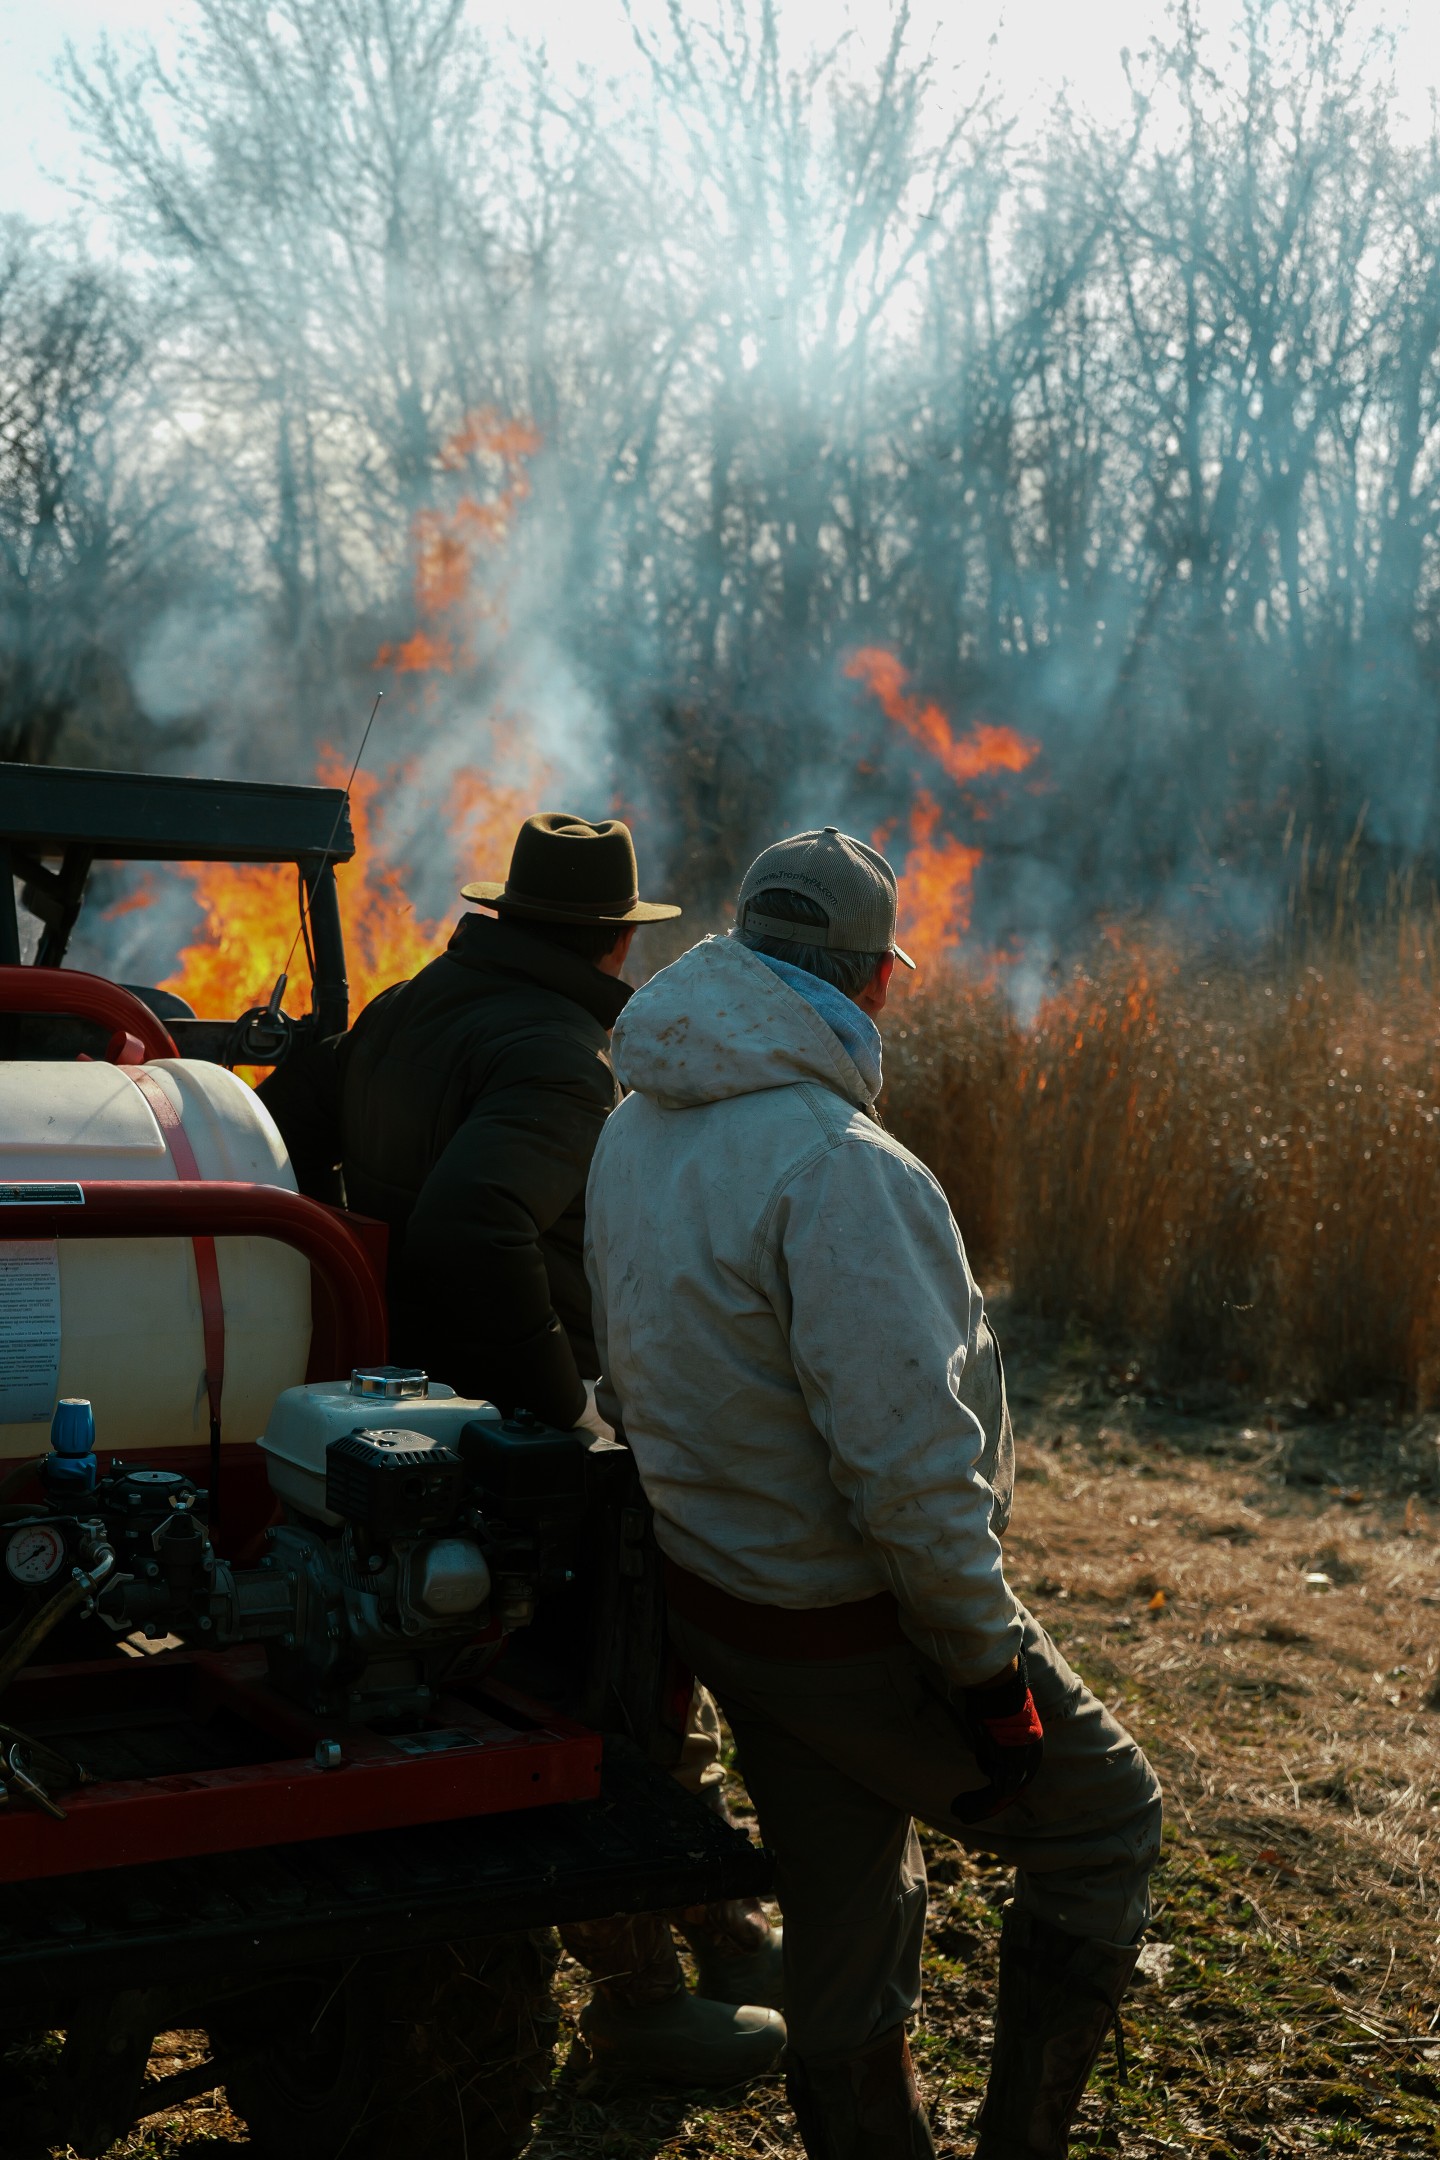
Personnel and Equipment
Your plan should list the minimum number of crew members required, their assigned roles, and the equipment they'll have. A typical burn crew for a 40–80 acre unit might include:
- Burn boss (1): The person in charge. Makes all ignition and suppression decisions. Monitors weather throughout the burn. Has authority to call off or shut down the burn at any time.
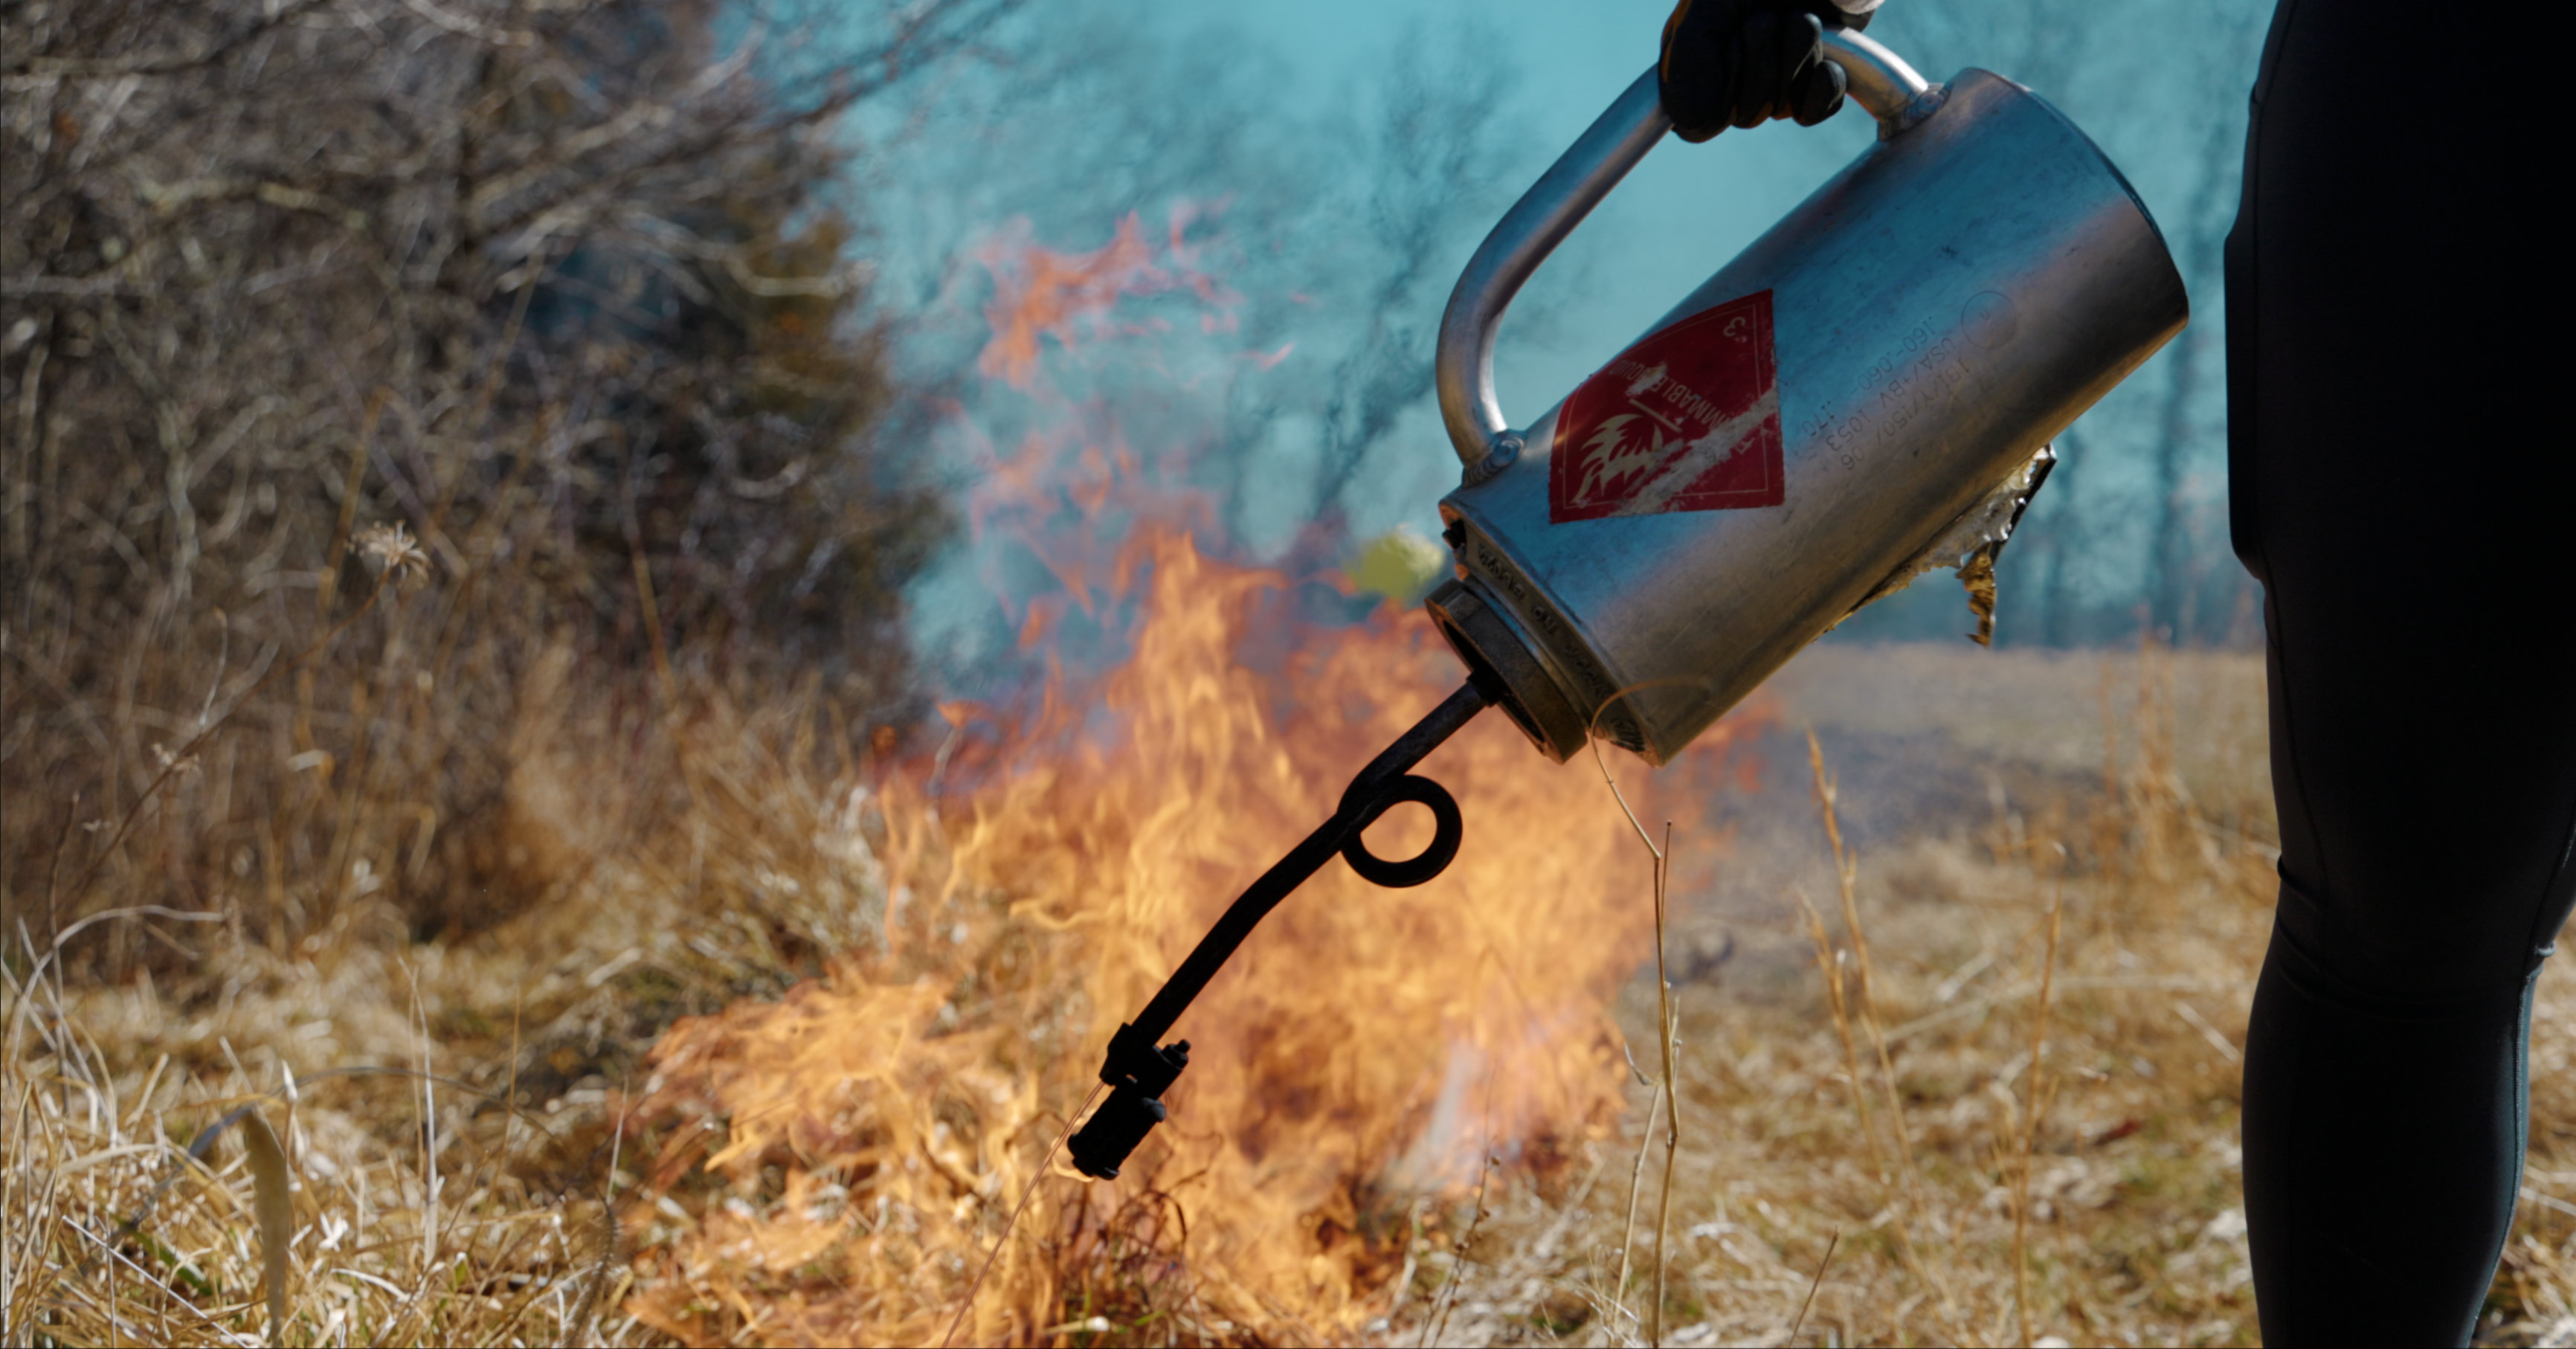
- Ignition crew (1–3): Operate drip torches or other ignition devices. Follow the burn boss's instructions for firing pattern and timing.
- Holding crew (2–4): Patrol the firebreaks with water (backpack sprayers, ATV sprayers, or a truck-mounted tank). Their job is to catch any spots that cross the line and keep the fire inside the burn unit.
- Spotter/lookout (1): Watches the downwind perimeter and monitors for spot fires, smoke drift, and changing conditions.
Equipment for a typical burn includes drip torches, backpack pump sprayers (5-gallon), an ATV or truck with a mounted water tank and pump (at least 100 gallons, ideally 200+), a disk or mower for emergency firebreak construction, hand tools (rakes, flappers, shovels), weather kit (Kestrel or similar for temperature, humidity, and wind readings), two-way radios for crew communication, and a first aid kit.
Critical safety gear: Every crew member must wear natural fiber clothing (cotton or Nomex — never synthetics like nylon or polyester, which melt and cause severe burns), leather boots, leather gloves, eye protection, and carry water. Hardhats and shrouds are recommended in timbered areas.
Notification Plan
Before you burn, you must notify your local fire department or fire protection district, all adjacent landowners, your county sheriff's office (in some jurisdictions), and any relevant state agencies. In Missouri, notification is a requirement under the Prescribed Burning Act and a condition of liability protection. Keep a written record of every notification — who you called, when, and what they said.
Contingency and Escape Plan
Every burn plan should include a contingency section that addresses: what you'll do if the fire escapes the burn unit, where your crew will retreat if conditions deteriorate, what resources you have available for suppression (water, equipment, backup help), trigger points for calling off the burn (wind shift, humidity drop, fire spotting beyond breaks), and emergency contact numbers for your local fire department and 911.
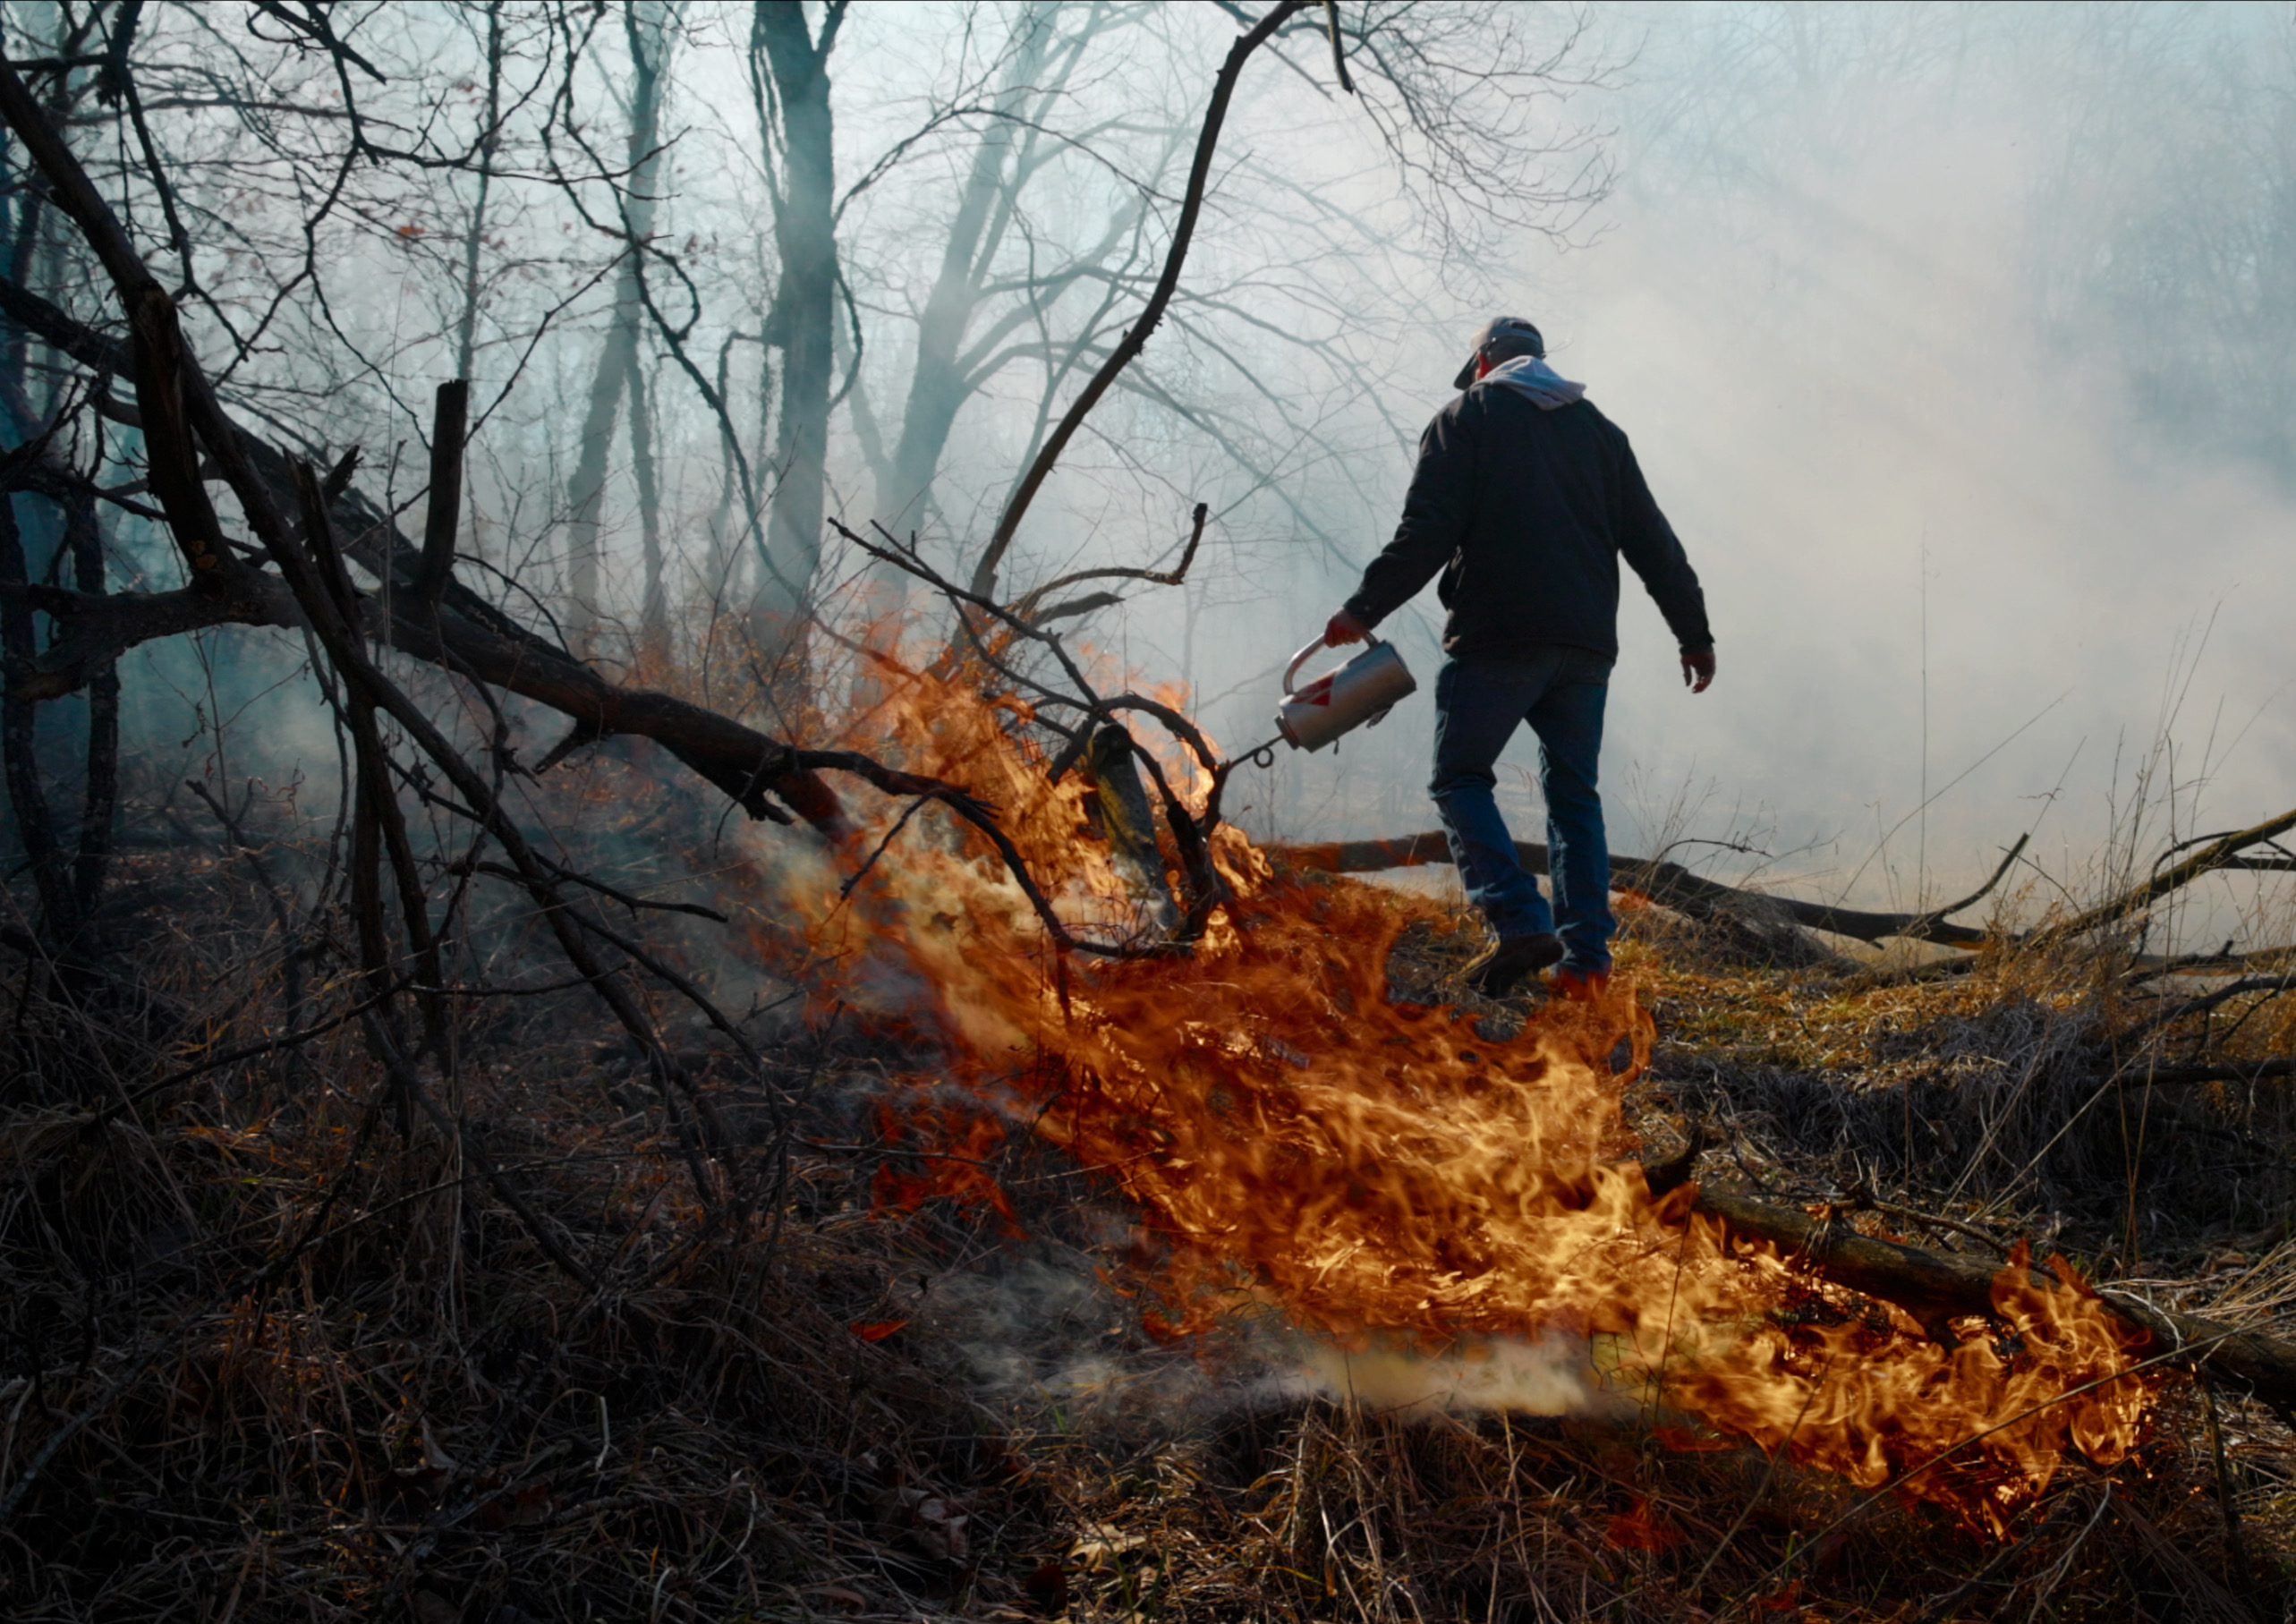
Step 3: Understand Firing Techniques
How you light the fire determines how it behaves. Understanding the three basic fire types — and when to use each one — is fundamental to conducting a safe, effective burn.
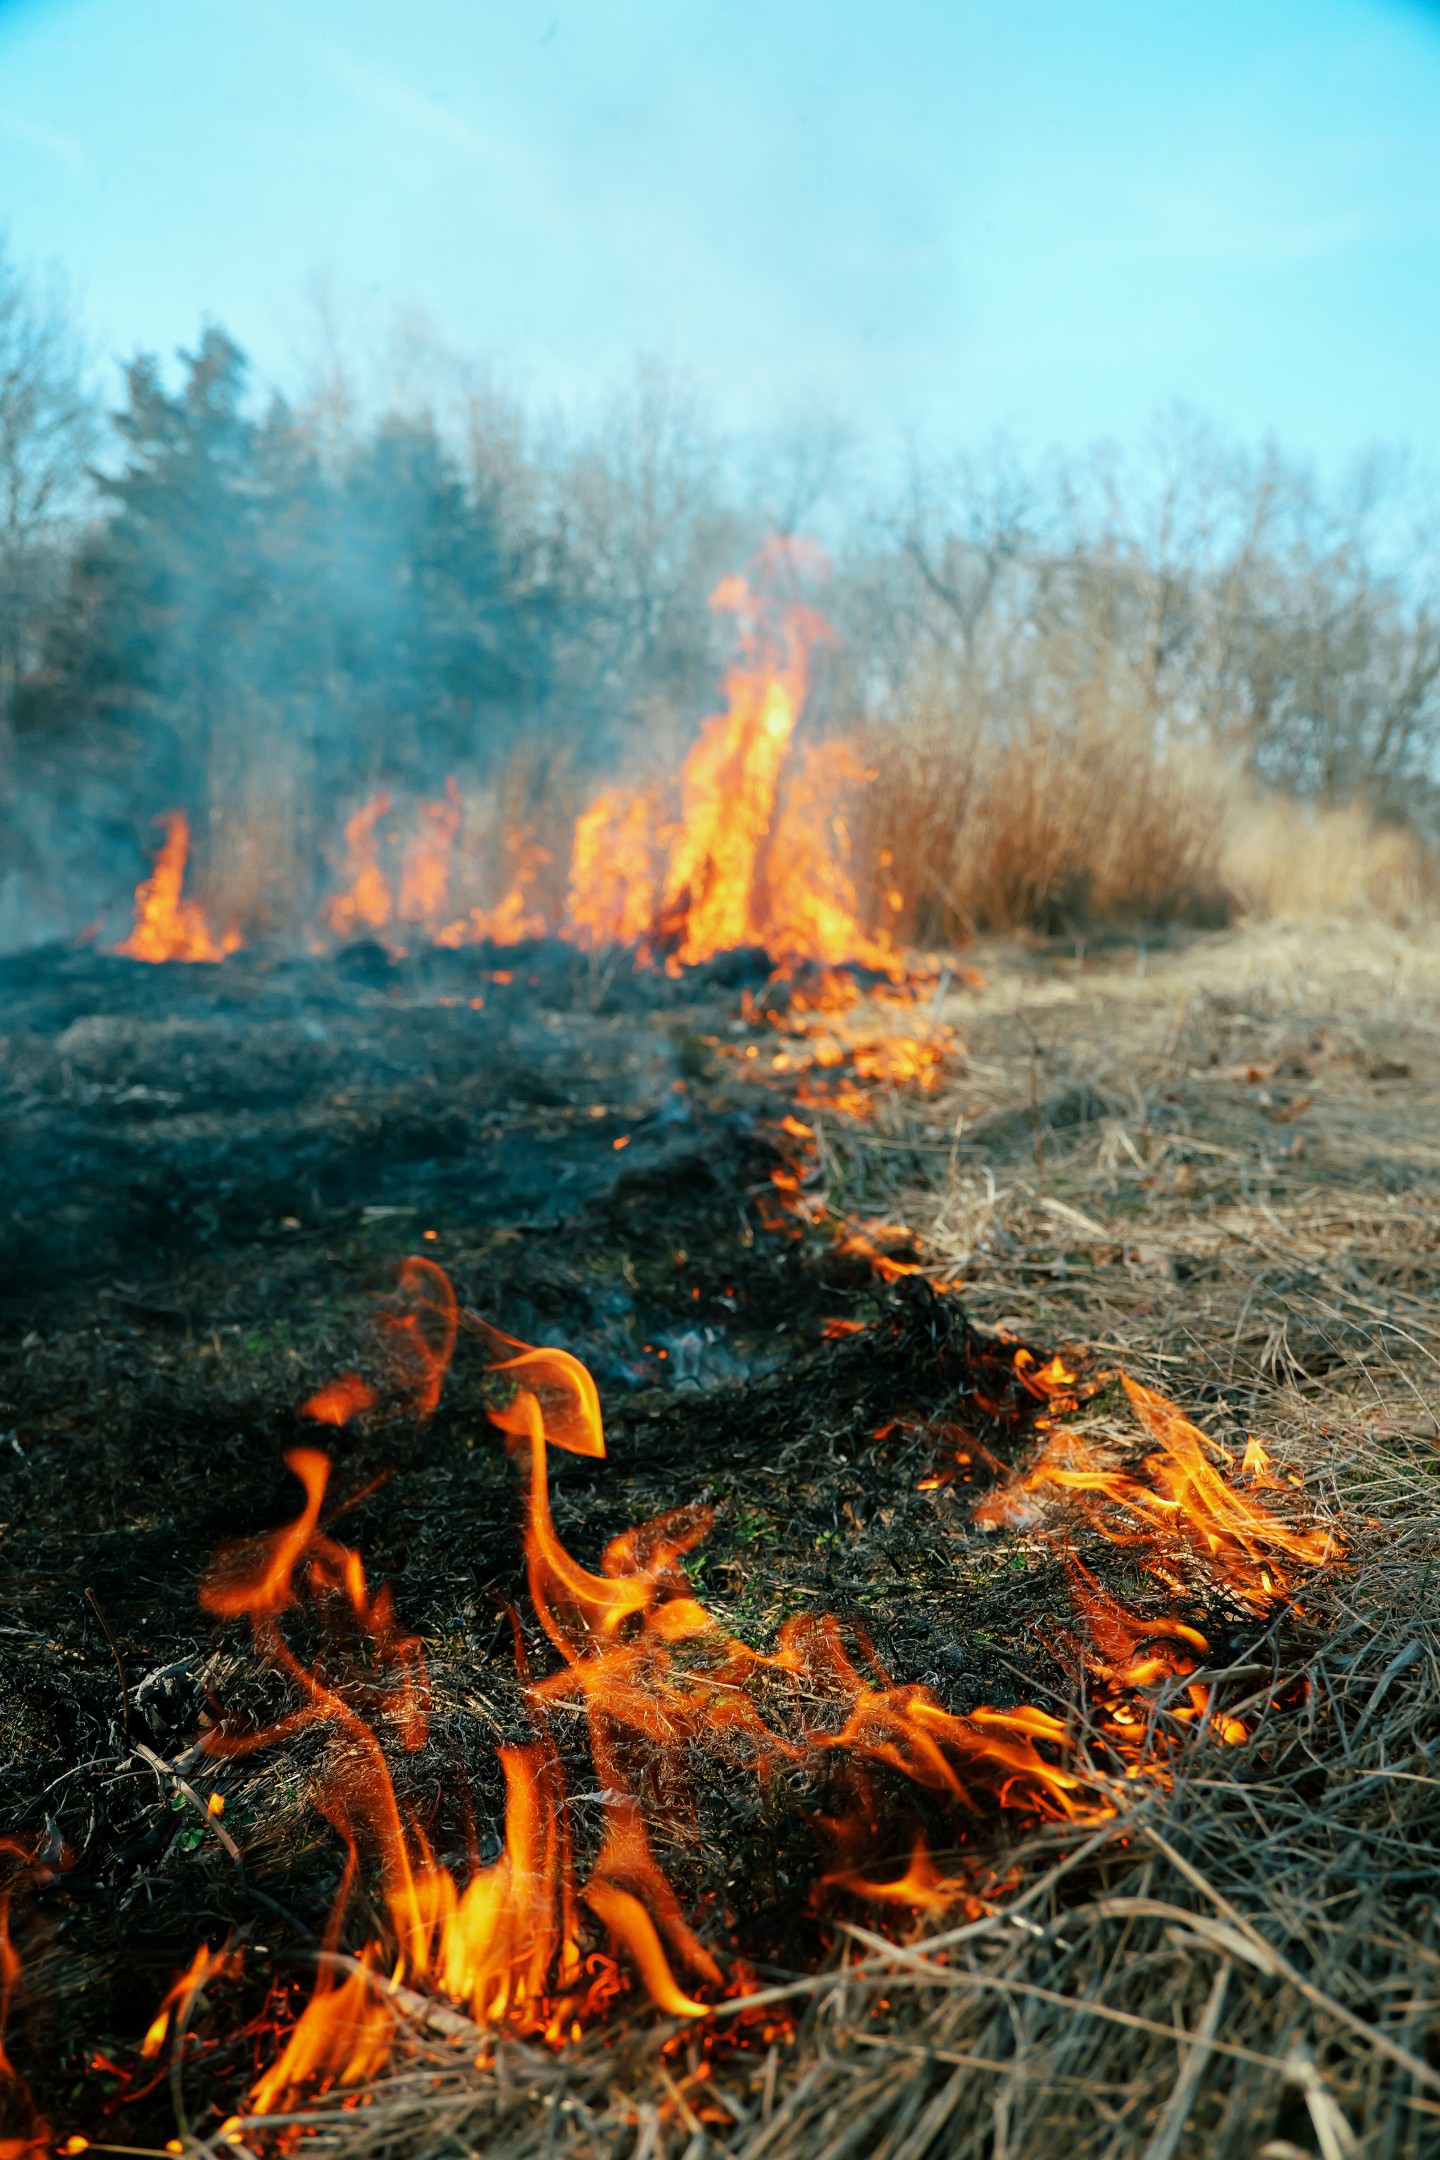
Backfire
A backfire burns into the wind. It's the slowest-moving fire type, with the shortest flame heights and lowest intensity. You'll use backfire first to create a "black line" of already-burned fuel on the downwind side of your burn unit. This strip of black acts as a wide, fireproof barrier that protects everything downwind.
Backfires are your safest, most controlled ignition pattern. They consume fuel more thoroughly than other fire types because the fire moves slowly and burns longer in each area. They also produce roughly one-third the smoke of a headfire, which is important for smoke management. The tradeoff is speed — a backfire through heavy native grass might move at less than one chain (66 feet) per hour.
When to use: Always light your backfire first. This is non-negotiable. You need black between the fire and whatever is downwind before you escalate to flanking or heading fire. If you're managing a native grass stand with heavy woody encroachment, a backfire alone may generate enough heat and residence time to effectively top-kill young cedars and saplings.
Flanking Fire
A flanking fire burns roughly perpendicular to the wind direction — it moves sideways across the wind. Its behavior is moderate, falling between a backfire and headfire in terms of flame length, speed, and intensity.
When to use: After your backfire has created a sufficient strip of black on the downwind edge, light flanking fires along the sides of the burn unit. This widens the burned area and prepares the unit for the headfire. Flanking fires also help connect your backfire to the upwind firebreaks.
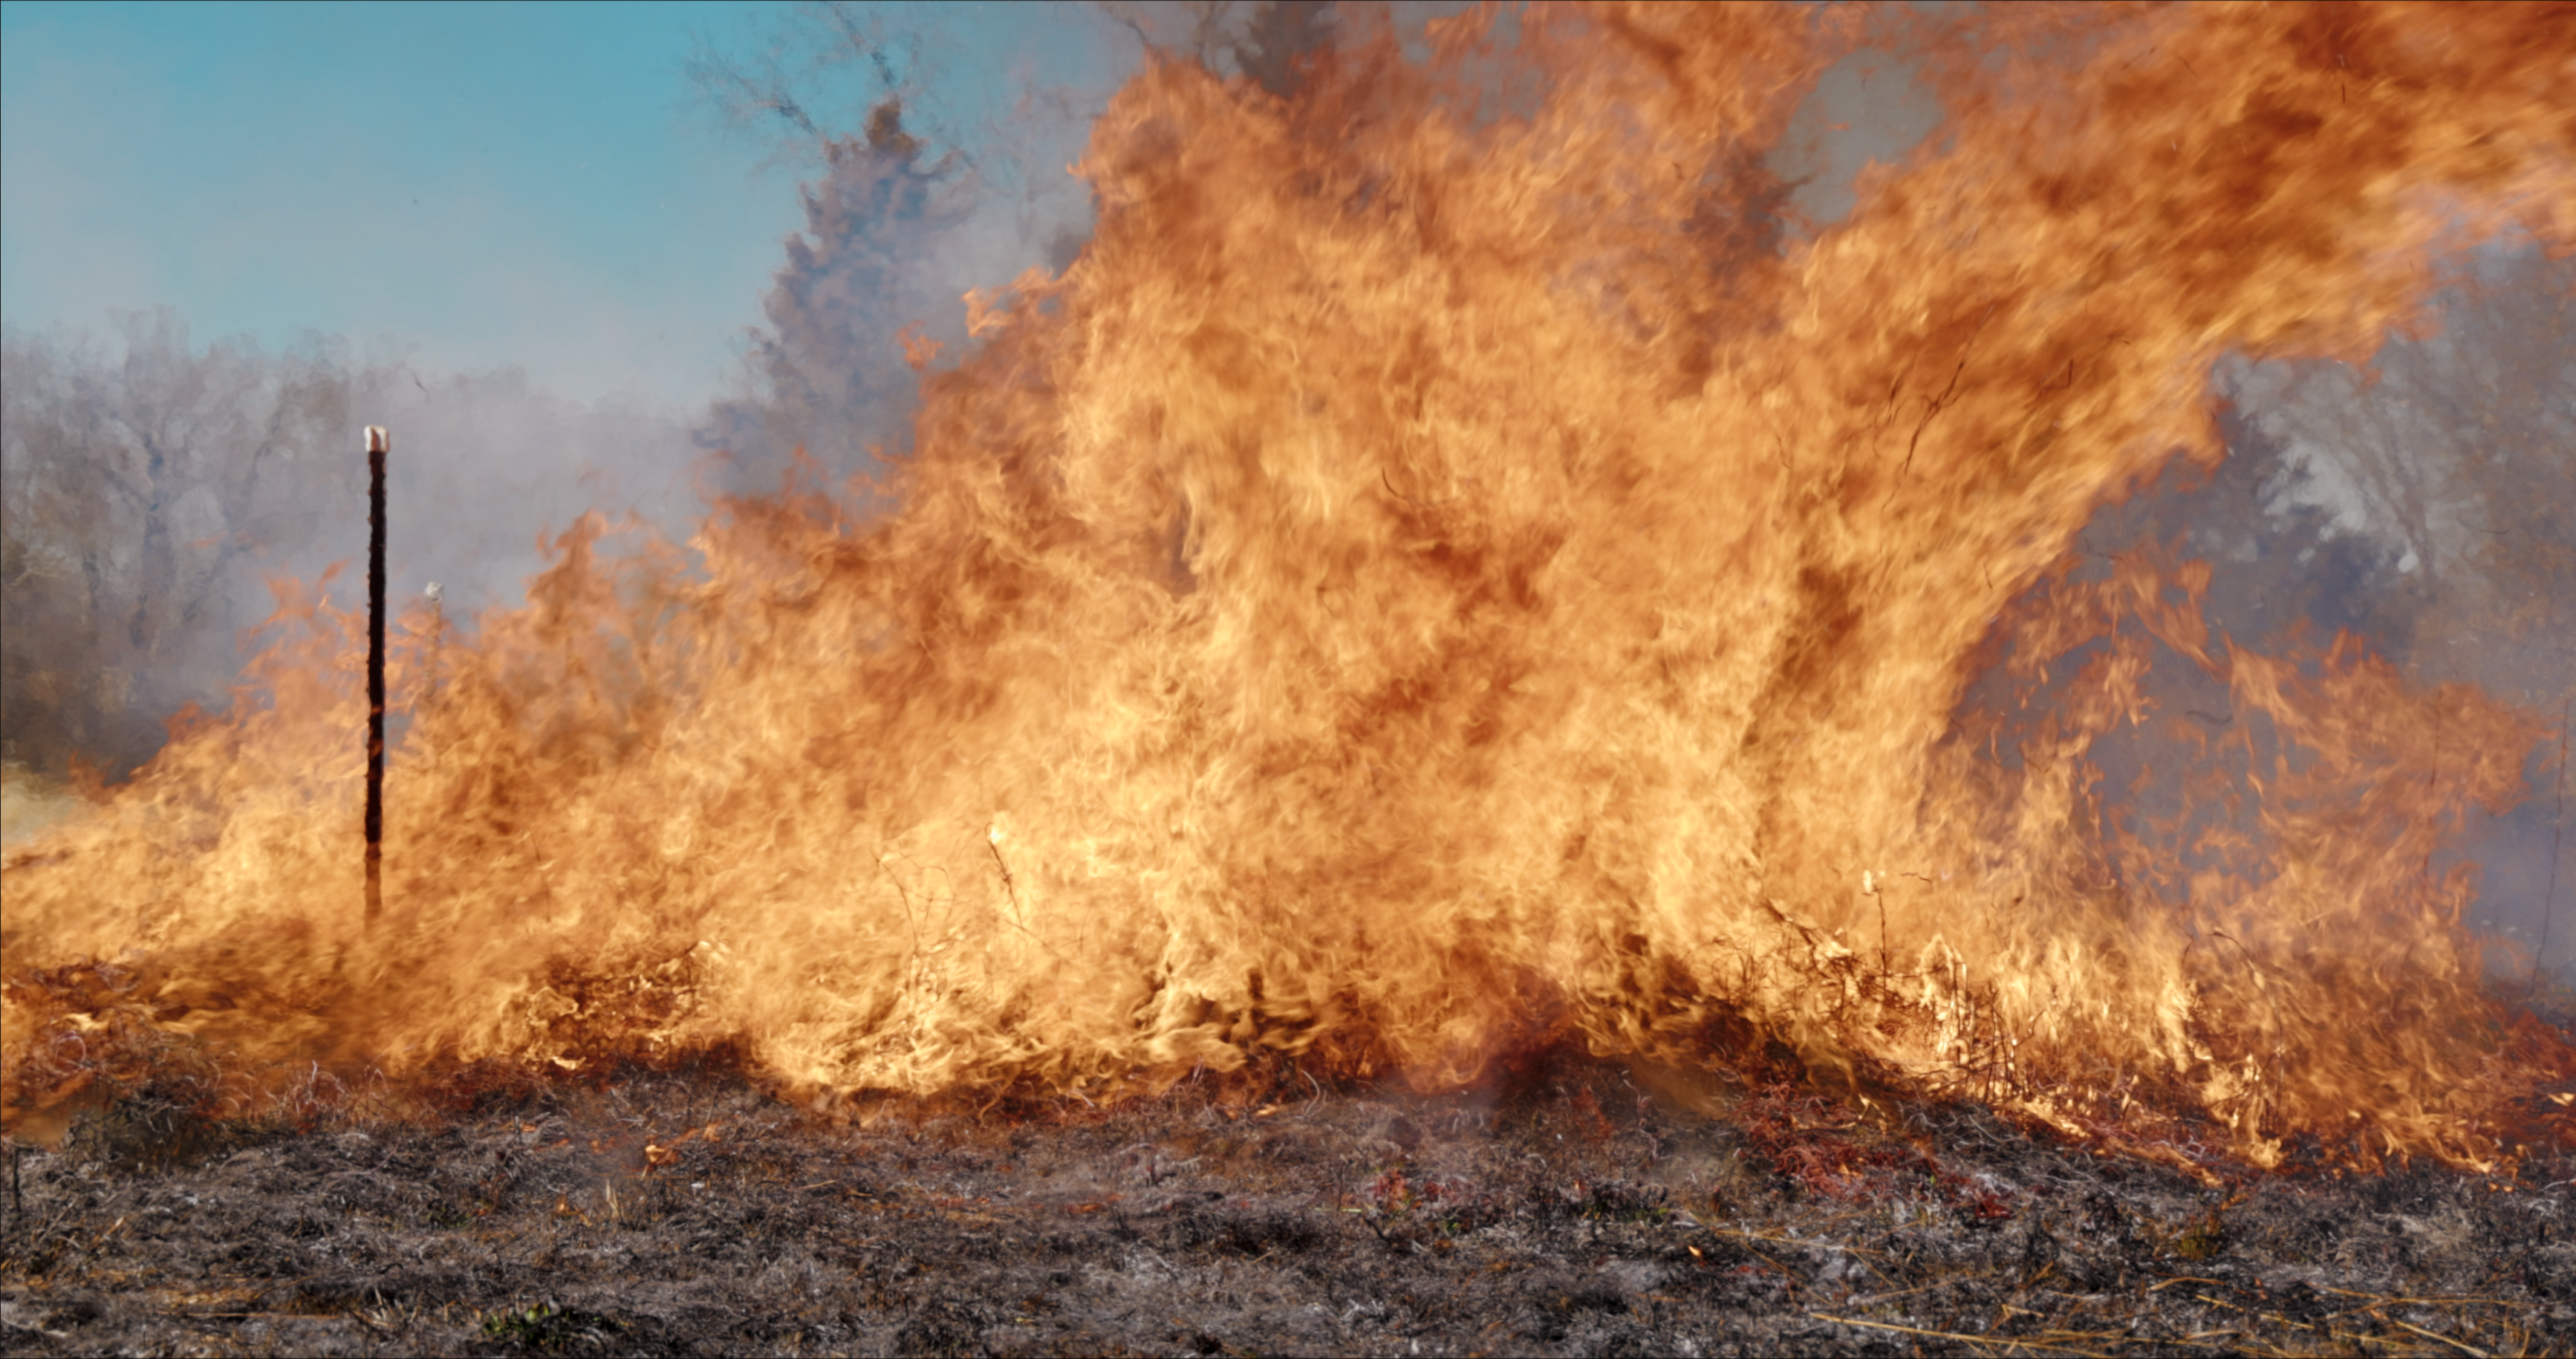
Headfire
A headfire burns with the wind. It's the fastest-moving, most intense fire type, with the longest flame lengths and greatest heat output. Because the wind pushes heat ahead of the flame front, a headfire actively pre-dries the fuel in front of it, which accelerates the fire and increases intensity.
When to use: Only after a secure perimeter of black has been established by your backfire and flanking fires. The headfire finishes the job — it moves quickly across the remaining unburned fuel toward the black you've already created on the downwind side. Headfires are dramatic, but when properly set up with adequate black on the receiving end, they're safe and efficient.
Strip Headfire (The Most Common Technique)
In practice, most prescribed burns use a strip headfire pattern rather than a single headfire. The burn boss lights a narrow strip of fire (typically 5–15 yards wide) on the upwind side, lets it burn toward the black, then lights another strip behind it. This controls the intensity by limiting how much unburned fuel the fire can access at once. It's the most commonly used finishing technique on Midwest burns and gives the burn boss excellent control over the fire's behavior.
The Standard Ignition Sequence
Putting it all together, the standard sequence for most Midwest burns looks like this:
- Light the backfire on the downwind firebreak. Let it burn inward until you have a solid strip of black, typically 30–100 feet deep depending on fuel height and expected headfire intensity.
- Light flanking fires along both sides of the burn unit once the backfire has established adequate black. Crew members light simultaneously from both ends, working from the downwind corners toward the upwind side.
- Light the headfire (usually as strip headfire) from the upwind side once the flanking fires have connected to the backfire's black. The headfire burns with the wind toward the black and is absorbed.
- Mop up and patrol. Walk the burn unit after the active fire passes. Extinguish any logs, stumps, or dung piles still burning near the firebreaks. Continue monitoring for at least 2–4 hours after the burn is complete, and check the area again the following day.
Step 4: Timing Your Burn for Maximum Benefit
When you burn matters almost as much as how you burn. The season of your fire dramatically affects which plants benefit and which are set back. Matching your burn timing to your management objectives is one of the most important decisions you'll make.
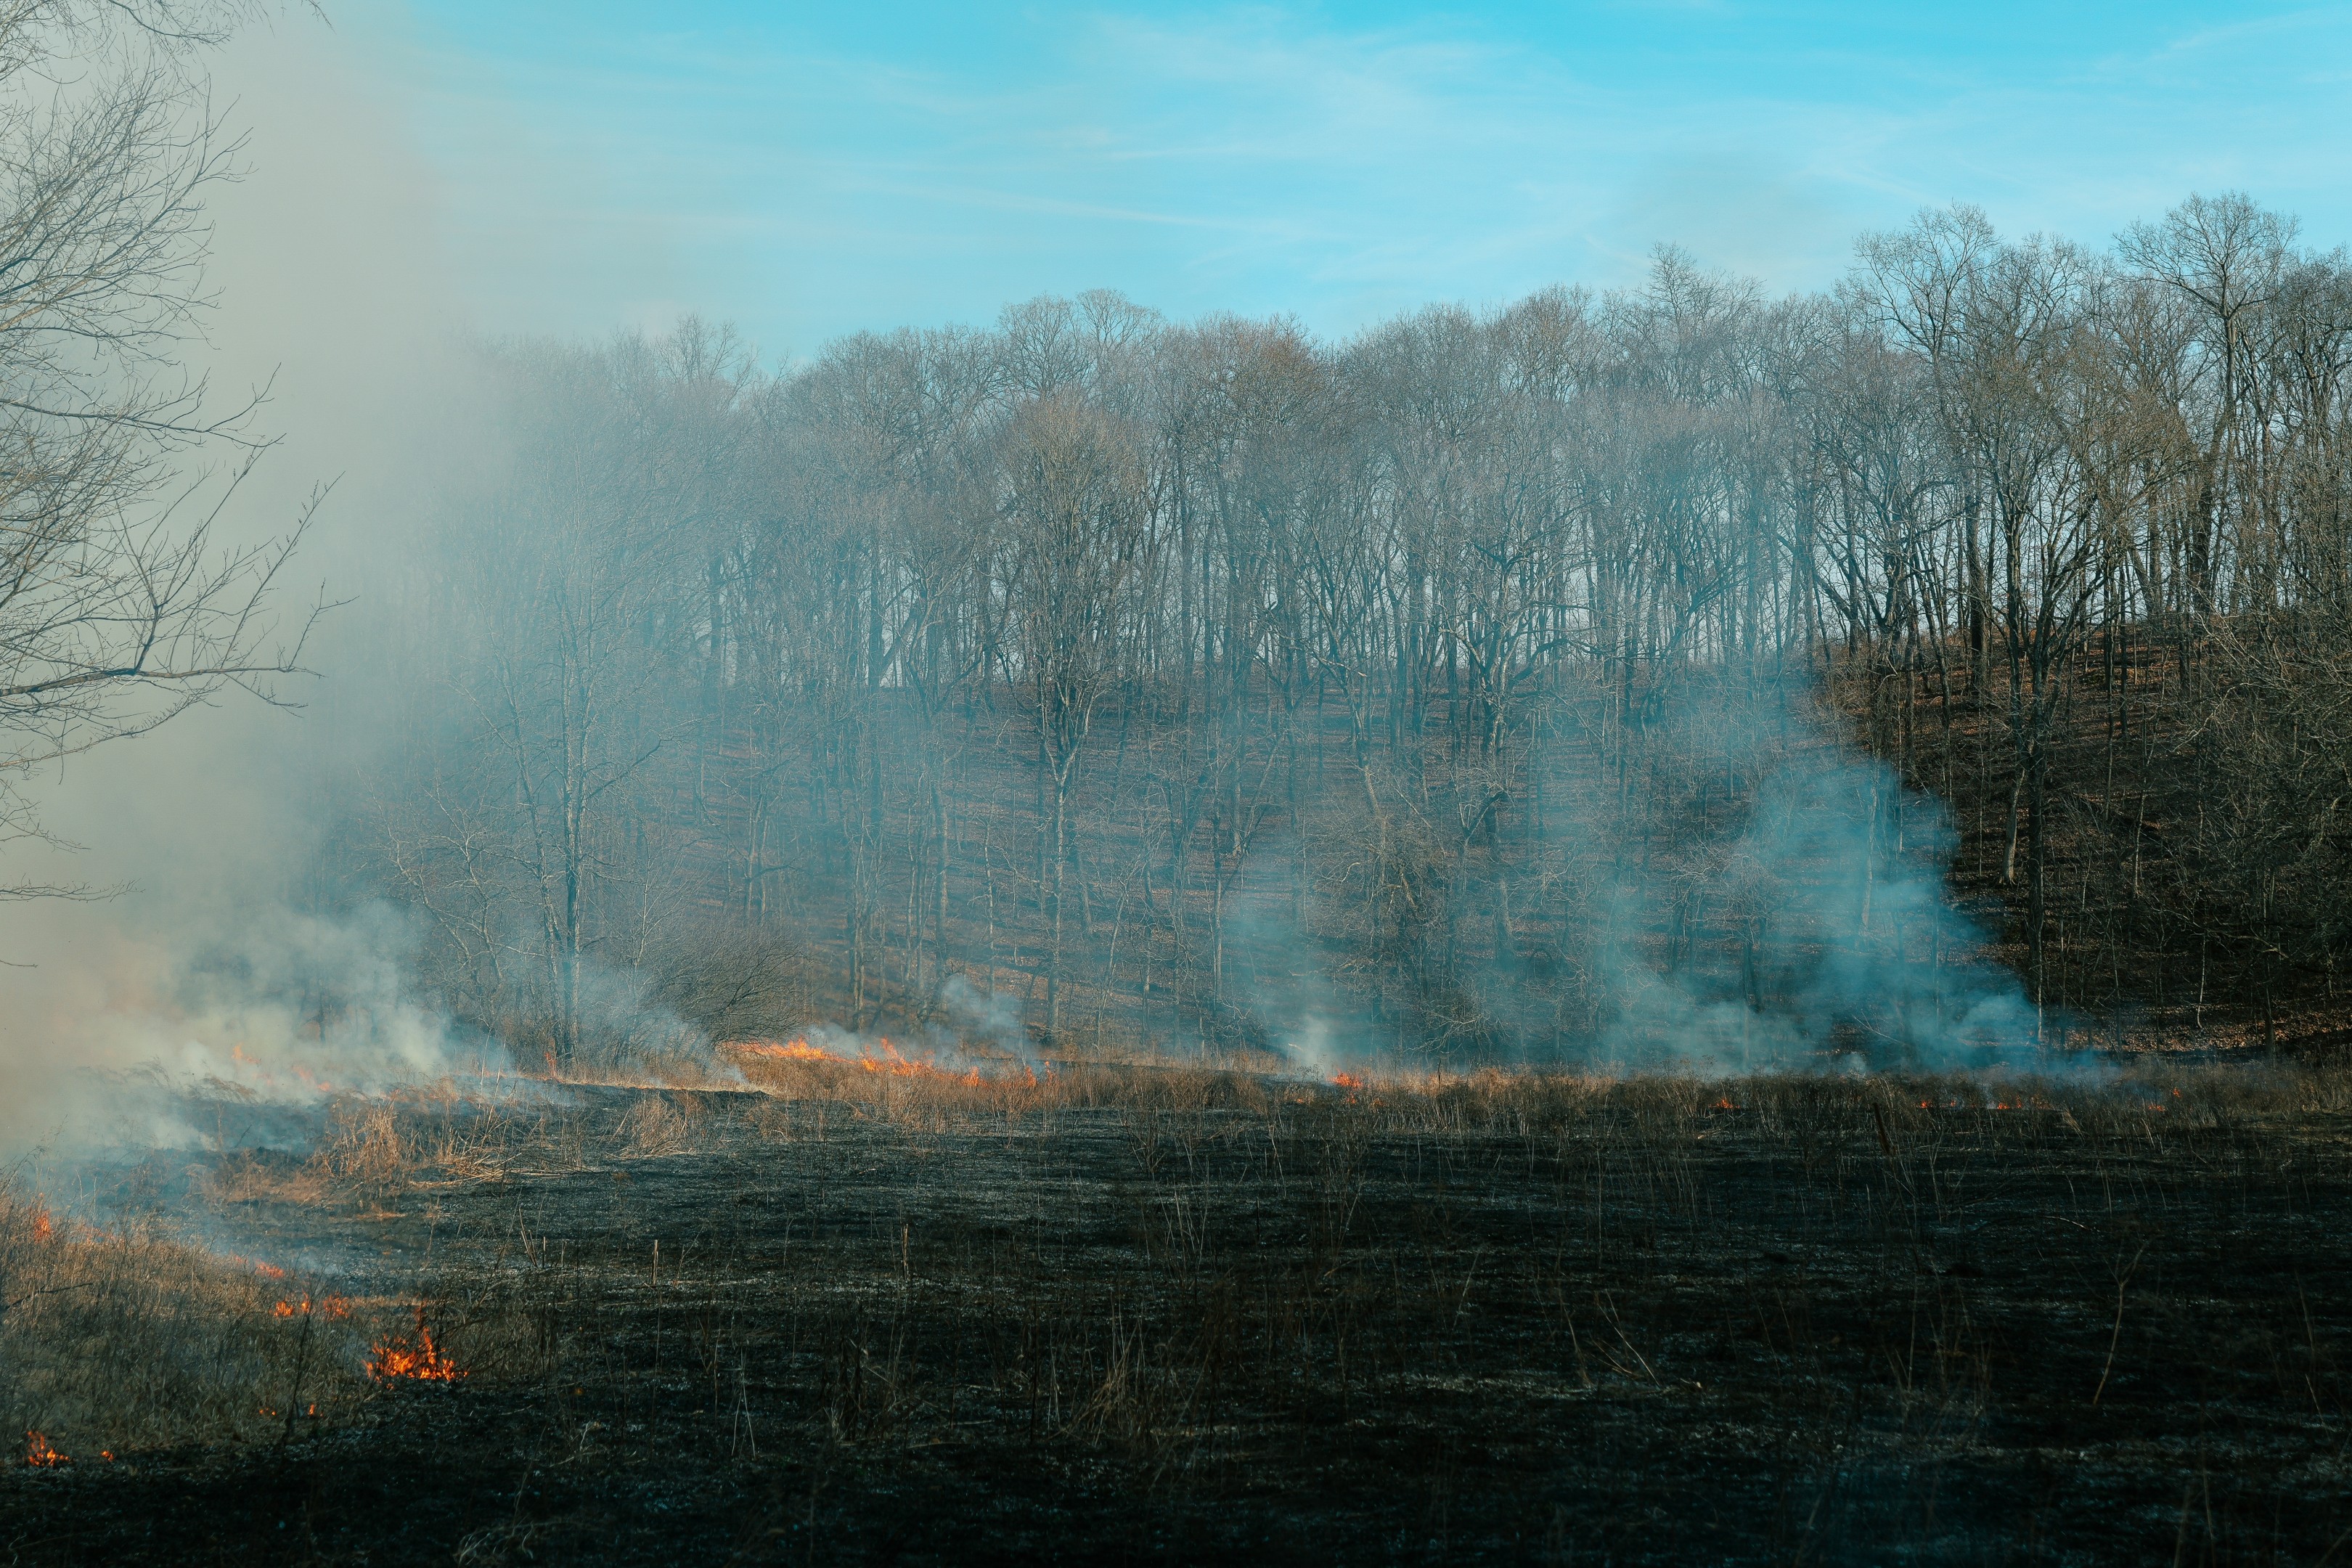
Late Winter / Early Spring Burns (February – Early April)
This is the traditional burn window across the Midwest and the most common timing for prescribed fire on private land. The advantages are significant:
- Native warm-season grasses are fully dormant, so fire doesn't harm them. Their energy is stored safely in deep root systems below ground.
- Cool-season invasives like fescue and brome are just breaking dormancy and are vulnerable to fire damage.
- Fuel loads (standing dead grass and accumulated litter) are at their peak, which means fire carries well and generates enough heat to be effective.
- Most wildlife species haven't begun nesting yet, minimizing impacts on ground-nesting birds.
- Conditions are generally more favorable for controlled burns — cooler temperatures, higher humidity, and predictable wind patterns.
Late winter burns are ideal for stimulating native warm-season grass growth, knocking back cool-season invasives, reducing cedar and woody encroachment, and general habitat maintenance.
Late Spring / Early Summer Burns (May – June)
Growing-season burns target different objectives. Fire during this window can be more damaging to cool-season species because they're actively growing and have invested their energy reserves in above-ground tissue. This makes growing-season burns particularly effective for fescue conversion and aggressive woody species control.
However, growing-season burns carry more risk for ground-nesting wildlife. Turkey, quail, and songbirds may have active nests that could be destroyed. For this reason, growing-season burns should be carefully planned and limited to specific units as part of a rotational burn program — never applied across an entire property at once.
Best for: Aggressive fescue and invasive grass control, cedar and brush top-kill when bark is thin and sap is flowing, and stimulating native forb production.
Fall Burns (September – November)
Fall burns are less common in the Midwest but can be effective for specific objectives. They're useful for reducing fuel loads before the spring burn season, preparing seedbeds for native grass or forb seedings, and managing certain invasive species that are vulnerable in fall.
Fall burns generally produce lower-intensity fires because fuel moisture tends to be higher and many plants still have green tissue. They're a good option for landowners who can't burn in spring or who want to diversify their fire regime.
Rotational Burning: The Key to Great Wildlife Habitat
This is one of the most important concepts in prescribed fire management, and it's where many landowners go wrong. Never burn your entire property in the same year. Instead, divide your land into burn units and burn different units in different years on a 2–5 year rotation.
A rotational burn program creates a patchwork mosaic of habitat — recently burned areas with low, open ground cover alongside older unburned areas with taller, denser vegetation. This structural diversity is exactly what deer, turkey, and quail need. Deer use the thicker unburned areas for bedding and the recently burned areas for feeding. Turkey hens nest in the thicker cover and bring poults to the recently burned open areas to feed on insects. Quail nest in the bunch grasses of 1–2 year-old burns and raise broods in the open, forb-rich recently burned areas.
A good rule of thumb: burn one-third to one-quarter of your property each year so that you always have a mosaic of burn ages across the landscape.
Step 5: Executing the Burn
The Day Before
- Check the forecast one final time. Confirm that conditions will be within your prescription window for the full duration of the planned burn.
- Inspect all firebreaks. Walk or drive the entire perimeter. Clear any debris, leaves, or vegetation that has accumulated since preparation.
- Test all equipment. Fire up your pump, check spray nozzles, test radios, fill drip torches, and top off water tanks.
- Confirm crew availability and assignments. Every person should know their role, position, and communication protocol.
- Make all notifications. Call your fire department, neighbors, and any required agencies. Document every call.
Burn Day
- Take on-site weather readings at least 30 minutes before ignition. Record temperature, relative humidity, wind speed, and wind direction. Compare these readings to your burn plan prescription. If any parameter is outside your prescription, do not burn. There's always another day.
- Brief your crew. Walk through the burn plan verbally. Cover the ignition sequence, firebreak assignments, contingency triggers, escape routes, and communication signals. Make sure everyone has water and is wearing proper gear.
- Start the backfire. This is where patience pays off. Don't rush the backfire. Let it develop a solid strip of black before moving to flanking ignition.
- Continue monitoring weather throughout the burn. Take readings every 30–60 minutes. Conditions can change quickly, especially in spring. If the wind shifts, humidity drops below your prescription, or you observe erratic fire behavior, shut the burn down and focus on holding what you've already burned.
- Communicate constantly. The burn boss should be in radio contact with every crew position at all times. Report any spot fires immediately.
- Complete mop-up. Walk the entire burn perimeter after the active fire passes. Extinguish anything burning within 30 feet of a firebreak. Pay special attention to stumps, log piles, and cow patties — these can smolder for hours and re-ignite.
After the Burn
- Monitor the burn area for at least 24–48 hours after the fire is out. Wind can push embers from smoldering material across firebreaks.
- Document everything. Photograph the burn area. Record the date, weather conditions, crew members present, area burned, and any issues that occurred. This documentation is important for your records, for future burn planning, and for liability protection.
- Log your burn. In Missouri, the MDC and Missouri Prescribed Fire Council encourage all private land burners to log their burns through the MPFC website at moprescribedfire.org. This data helps the state track the scope of prescribed fire use and advocate for continued landowner burning rights.
Step 6: Legal Considerations, Liability, and Insurance
Missouri's Prescribed Burning Act
Missouri's Prescribed Burning Act (RSMo Section 537.354) is one of the more landowner-friendly prescribed fire statutes in the Midwest. Under this law, a landowner or their agent is not liable for damage, injury, or loss caused by a prescribed burn or its smoke — provided certain conditions are met. These conditions generally include having a written burn plan, following that plan, conducting the burn under appropriate weather conditions, and meeting certification and notification requirements.
This is precisely why training, certification, and a written burn plan matter so much. They're not just best practices — they're your legal shield.
Illinois, Iowa, and Kansas
Each state handles prescribed fire liability differently. Illinois has notification requirements but less formal liability protections. Iowa and Kansas both have prescribed fire statutes that offer varying degrees of liability protection for landowners who follow approved burn plans and meet training requirements. Regardless of your state, the principles are the same: get trained, write a plan, follow it, notify everyone required, document everything, and never burn outside your weather prescription.
Insurance Considerations
Talk to your farm or rural property insurance agent about your prescribed fire program. Some policies include coverage for prescribed fire damage; others exclude it or require a rider. Ask specifically about liability coverage for smoke damage to neighbors, fire escape damage, and any certification or burn plan requirements your insurer may have. A growing number of insurance companies recognize that prescribed fire reduces wildfire risk and are becoming more accommodating of landowners who burn responsibly.
Step 7: What to Do After the Burn — Monitoring and Follow-Up
The work doesn't end when the smoke clears. What you do in the weeks and months after a burn determines whether you get the full benefit of your effort.
Monitor Plant Response
Walk your burn units regularly throughout the growing season after the fire. Note which species are coming back and how vigorously. Take photos from fixed points so you can compare year over year. Look for the response you were targeting: native warm-season grass regrowth, forb and legume emergence, reduction in woody sprouts, and absence of invasive cool-season species.
Follow Up with Targeted Management
Prescribed fire works best as part of an integrated management approach. After a burn, consider spot-spraying any surviving fescue or invasive species that the fire didn't fully control. Interseeding native forbs or grasses into burned areas where you want to enhance diversity. Adjusting grazing intensity to allow burned areas to recover before livestock pressure resumes. And planning your next burn in the rotation to maintain the momentum you've built.
Track Your Results Over Time
Keep a journal or digital record for each burn unit. Track the date burned, weather conditions, firing technique, plant response, wildlife observations, and any issues. Over several years of burning, this data becomes invaluable for refining your approach and demonstrating the improvement in your property. Landowners who document their management are also better positioned for cost-share programs through NRCS (EQIP, CSP) that can help offset the costs of prescribed fire.
Let Trophy Properties and Auction Help You Get More From Your Land
At Trophy Properties and Auction, we don't just help you buy and sell rural real estate — we help you make the most of it. Prescribed fire is one of the most powerful tools in a landowner's toolkit, and we're passionate about connecting our clients with the resources, knowledge, and professionals who can help them use it effectively.
Whether you're looking for a property with established habitat that's been managed with fire, or you want guidance on improving the land you already own, our team knows Midwest rural land inside and out.
Contact us today — let's talk about your property and your goals.
 RSS Feed